Probably the biggest and boldest development in the history of WordPress, Gutenberg asked its users to change their daily routine, which resulted in a controversial, to say the least, reception from the community.
One of the main reasons that many people hate Gutenberg and install the Classic Editor plugin, is that they don’t find the new environment convenient enough for the simplest task of writing a post. The familiar toolbar of the Classic Editor seems to be much more straightforward and productive than the “find the block” logic of Gutenberg. Is it really the case, though?
This article focuses on Gutenberg for content editors and writers, not developers, designers, or theme implementors. The goal is to present you with a few key tips that will help you get the most out of Gutenberg and, hopefully, make you more productive than you could ever be with the Classic Editor.
Find blocks as you type (the Slash Command)
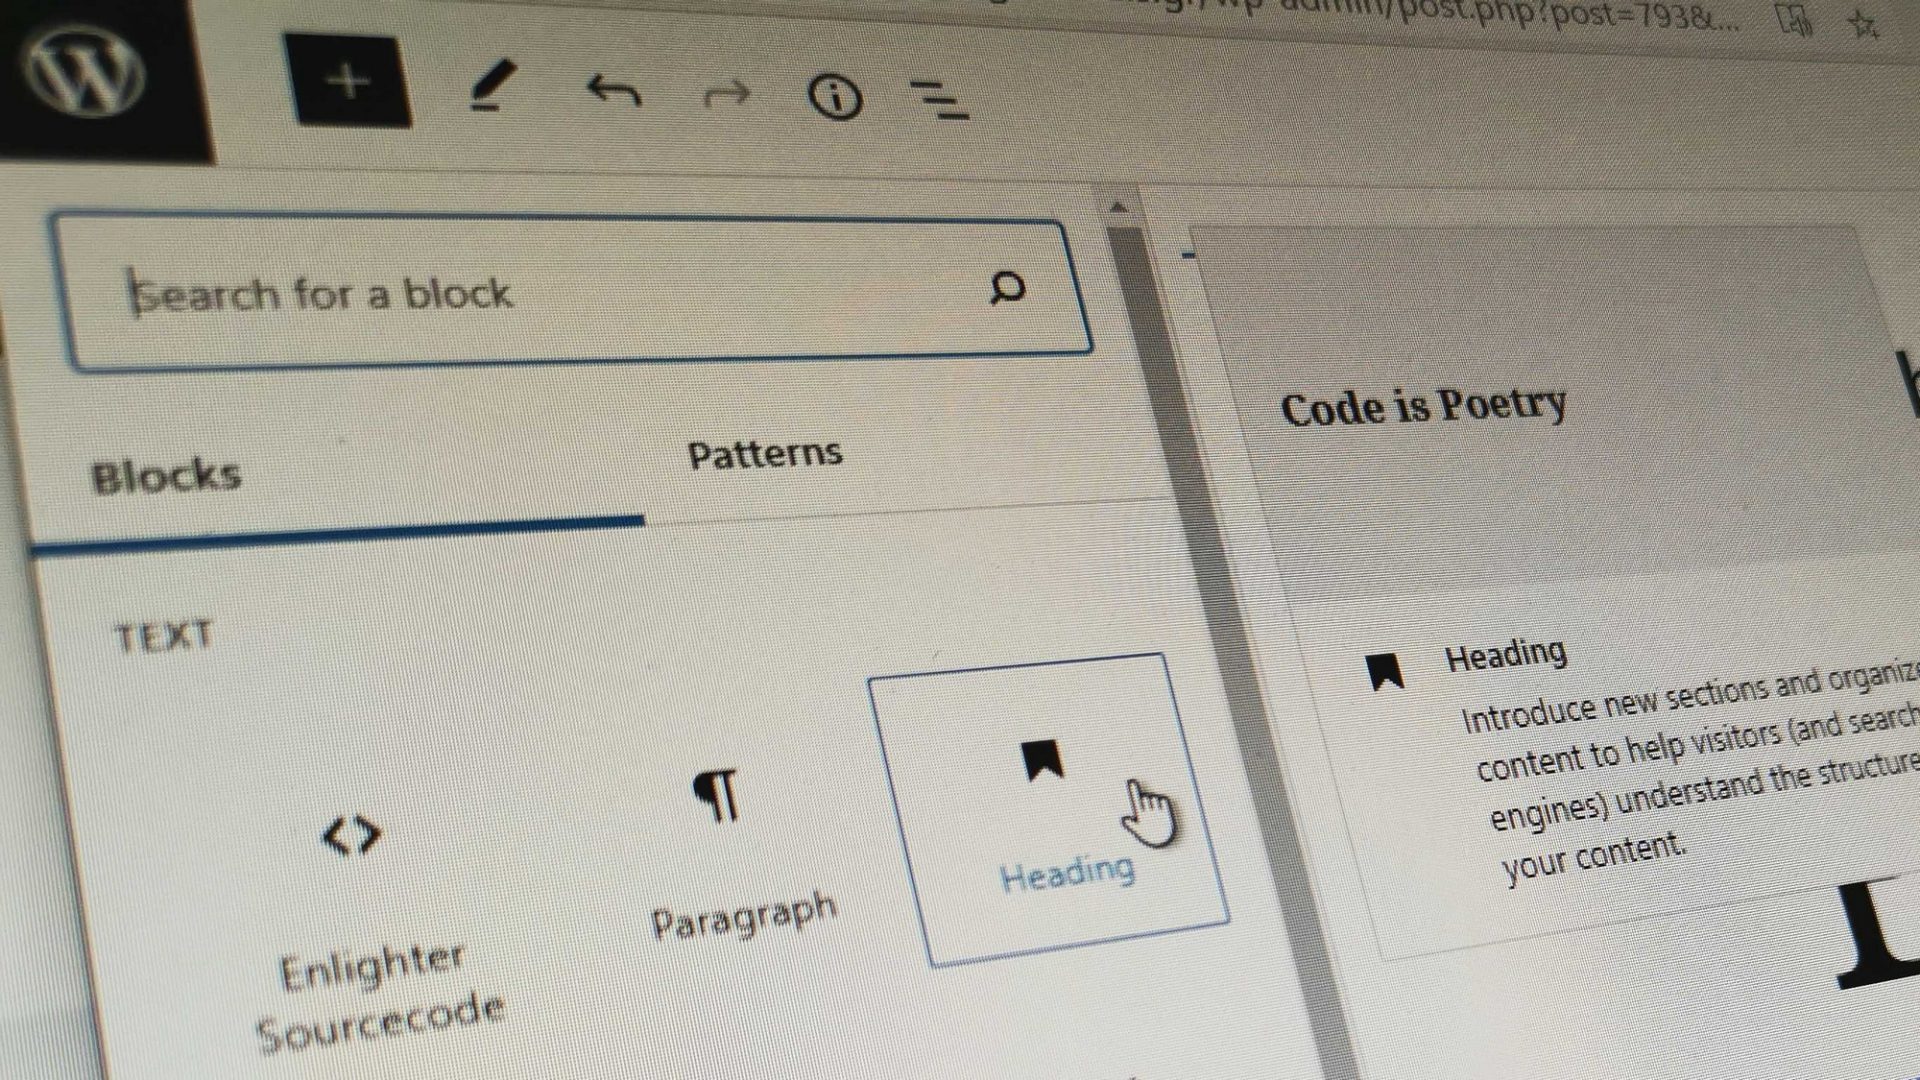
This is one of the first tips that I mention every time I demonstrate Gutenberg to someone. You don’t have to click on the + button at the top left of your screen to find a block. Instead, Gutenberg allows you to instantly search for a block by hitting / (Slash) on a new line and start typing the name of the block. Then, hitting enter will bring up the first result.

Another benefit of that method is that as you use it, it remembers the blocks that you use more often and shows them first when you hit /. Trust me, as soon as you get used to it, you will stop searching for the “plus” buttons, as you will not have to move your hands from the keyboard at all.
Markdown (sort of)
Markdown is a love it or “I had no idea that it can be so useful” kind of thing. When I first read about it, I didn’t even give it a shot, as it seemed counter-productive to learn its shortcuts instead of point and clicking the buttons that I was get used to. After using it for a while to write some documentation on GitHub, though, it didn’t take me too long to start googling for “Markdown plugin for WordPress” or “Markdown for Gutenberg”. The results were disappointing, as nothing did what I was expecting.
But then it hit me. What if Gutenberg supported it already? So, I tried typing a few familiar shortcuts and Boom! It was there all along! It was both exciting and frustrating at the same time, considering the time I spend searching for something that was right in front of me in the most obvious of ways.
Technically, I’m not sure if it is actually considered as Markdown in a strict sense, but it supports some of the most important shortcuts that someone familiar with the syntax would expect. So, for example, typing # + space on a new line will create a Heading 1. ## + space corresponds to a Heading 2 and so on.
Similarly, typing > + space on a new line will open a quote, * + space or - + space open a bulleted list and wrapping some text in `` will convert it to an inline code tag.
Keyboard shortcuts
Keyboard shortcuts are not a Gutenberg novelty, as they existed on WordPress and most software all along. For some reason, some people tend to avoid them, as if point and click with the mouse is faster and more efficient. Memorizing those few shortcuts that you use more often, though, could offer a great boost to your productivity, and it is always good to know which ones are available.
To see all the available shortcuts that WordPress and Gutenberg support, you can hit Alt+Shift+H or Ctrl+Opt+H if you are on a Mac. This opens up the shortcut window, which can be used as your cheat sheet:
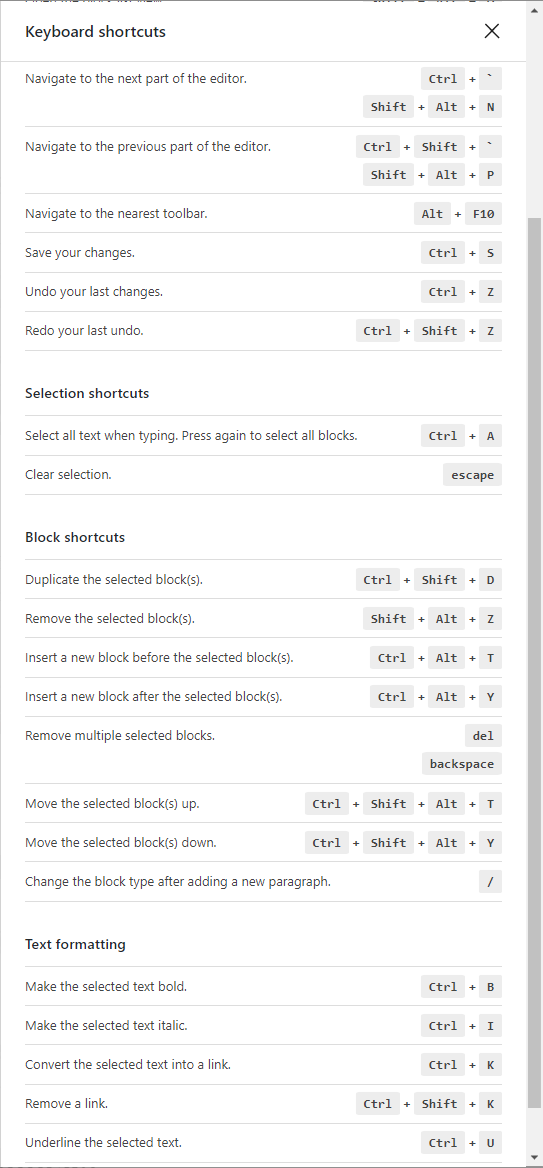
Personally, Ctrl+S (or Cmd+S if you are on a Mac) is my favorite, as I like to manually save my work from time to time (an old habit from the old days of MS Word).
Other shortcuts that I use all the time include Ctrl+K to add a link, and, of course, the popular Ctrl+B and Ctrl+I for bold and italics and Ctrl+C, Ctrl+X and Ctrl+V for copy, cut and paste, respectively.
Also, writing this article helped me discover Ctrl+Shift+Alt+T and Ctrl+Shift+Alt+Y, which allow me to reposition multiple blocks in a batch.
Remember: if you are on a Mac, instead of Ctrl, you should use the Cmd key.
Give me a break (with Shift + Enter)
If you want to leave a blank line between two paragraphs, you should avoid leaving an empty paragraph. It is not semantically correct (HTML Markup validators might display an error), and depending on your CSS, it might make little or no visual difference (e.g., if your p tag has zero padding).
Instead, you could type Shift + Enter , which would add a <br> (Line Break) element. The Line Break element can also be useful when you want to break some text on a specific point, without necessarily leaving extra space, for example on a poem or an address, where the division of lines is significant.
It should be noted that this isn’t a Gutenberg-specific feature. Shift + Enter is an old “trick”, which can be used with most WYSIWYG text editors (Classic Editor included).
Select text and paste a URL on top of it, to make it a link
Speaking of non Gutenberg-specific tips, here’s one more, which is old but not very well-known: If you select some text and paste a link on top of it, the Editor – both Classic and Gutenberg – will automatically convert the text to a proper link:
Combine this with a Ctrl+V (or CMD+V) instead of right click → Paste, and you can add links in no time.
Drag and drop images
That one is among my favorites, as it is a great convenience, which isn’t supported at all in the Classic Editor: You can upload an image from your computer to Gutenberg and place it anywhere you want, simply by dragging it, saving quite a few clicks along the way.
What is even nicer is that by selecting and dragging multiple images at once, the Gutenberg Editor will automatically create a gallery anywhere you drop them.
Upload external images
Speaking of images, since version 8.5, Gutenberg allows the user to to upload images from third-party sites instead of simply hotlinking them, as long as the image host allows it.
This can be very useful, for example, when you copy content from a Google Doc. Just select the external image, click on the “Upload external image” button and WordPress will automatically download the image to your server.
Keep in mind that if you dont’ see the button, it probably means that the host doesn’t allow cross origin resource sharing.
On that case, if you use Windows and want to insert an image, a neat trick that might save you some clicks is to copy the image’s url, hit the media upload button and instead of downloading the image and browsing your hard drive to find it, just paste the url. This is not a Gutenberg-specific trick and you can use it anywhere in Windows.
Smart copy/paste that keeps no garbage
Copying content from sources like Word or Google Docs to the classic editor can be a hassle, as it tends to keep “garbage” code that messes with the result in unpredictable ways. Most of the times I advised contend editors to paste the content on a notepad first, to clean-up the formatting, then paste it to WordPress and format it back there.
Gutenberg, on the other hand, handles it much better. You can simply copy and paste the content and the chances are that it will be transferred perfectly, with no weird span tags or inline styles, keeping the correct headings and paragraphs, links on their right place, bold and italics in place as well.
You can even copy a photo from a Word document and paste it directly into Gutenberg and it will automatically upload it on the Media Manager and insert it at the right place.
I don’t know if it works so flawlessly all the time, with every content possible, but in my case, every time I needed it, it was surprisingly efficient.
Copy/paste entire groups of blocks or even entire posts
Suppose that you have a post and that you would like to copy its contents in another post. What would you do? If the entire post’s contents are in the Classic Editor, you could copy/paste it. If we are talking about more complex content, though, made with some page builder or ACF fields, then your only option would probably be to clone the entire post using some plugin or WP-CLI. So, if the two posts were in different instances of the site (e.g. from local to live), things could get much more complicated.
With Gutenberg, on the other hand, all you must do is select the entire content or just the blocks that you want and simply copy and paste them to the other post. Technically, what you are copying is just some HTML markup along with the comments that contain the block metadata (attributes etc.), so pasting to another post is easy and flawless.
Transform one block to another
If you created a block only to realize that it was the wrong one, you don’t have to remove it and create it again. Gubenberg allows you to transform one block to another, as long as it makes sense, of course.
For example, you can’t, obviously, convert a paragraph to an image (even if they say that an image is worth a thousand words), but you could convert it to a heading, a quote, or a list.
Reusable Blocks
A relatively unknown feature, Reusable Blocks allows you to save a block or a combination of blocks as one reusable block, which you can retrieve anywhere on your site.
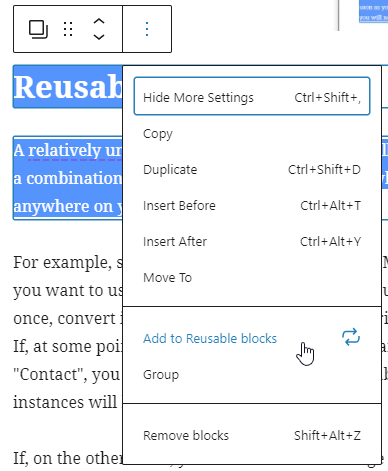
For example, suppose that you create a “Contact Me” button block, which you want to use on various pages of your site. You can create the block once, convert it to a reusable block and then retrieve it anywhere you like. If, at some point, you decide that you want to change the wording to “Contact”, you can make the change on the reusable block and all the other instances will be updated as well.
If, on the other hand, you need to make a change on the spot but don’t want to change other instances, you can convert it back to a standalone block and edit it independently.
Keep in mind that reusable blocks are not templates (that would be Block Patterns but creating them requires some basic technical skills and is out of the scope of this article). Instead, they contain both content and design.
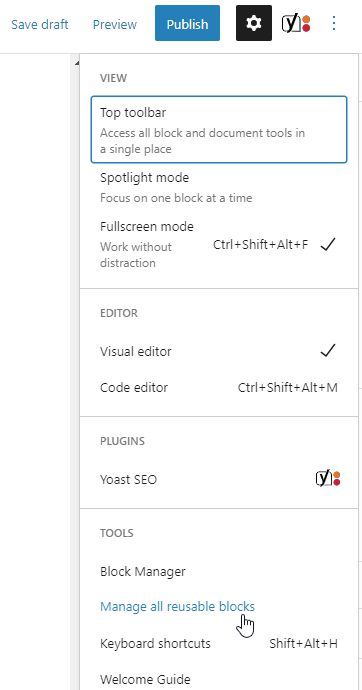
Additionally, reusable blocks can be imported and exported, so that you can even use them on other sites. To manage all your reusable blocks, you should click on the Editor’s Options (the three vertical dots at the top right corner) and select the “Manage all reusable blocks” option.
Block groups
The Group Block is simply a block that groups other blocks together inside a single container. You could think of it as a “parent” block that can hold multiple “child” blocks within it. It can have many uses, and one of the most popular is to group a set of other blocks together and add a background color to all of them.
Combine it with the Reusable Block feature and some imagination, and you can organize your content in a few interesting ways.
Mind the gap
Back in the old days of the Classic Editor, if you wanted to add extra space between your content, you had to resort to hacks. With Gutenberg, there is a block for that: the Spacer Block.
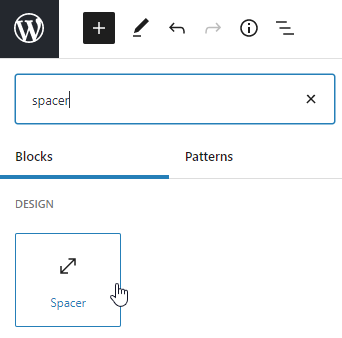
The Spacer block is used when you want to create a white space between blocks and customize its height, either by setting a specific number of pixels or resizing it by hand with a simple drag. You can also add a CSS class to give it an additional design.
On the frontend the Spacer Block will print out a simple empty div with aria-hidden="true", which makes it semantically OK to use.
As a sidenote, I believe that, currently, the Spacer Block isn’t ideal, as users might easily misuse it, messing with the theme’s intended design. There are discussions, though, to allow theme developers setting the available heights of the block, offering them more control on that regard.
Customize your Workspace
As a final advice, you could take some time to customize your workspace according to your liking. For example, some people don’t like the distraction-free full-screen mode which makes it harder to return to the WordPress dashboard.
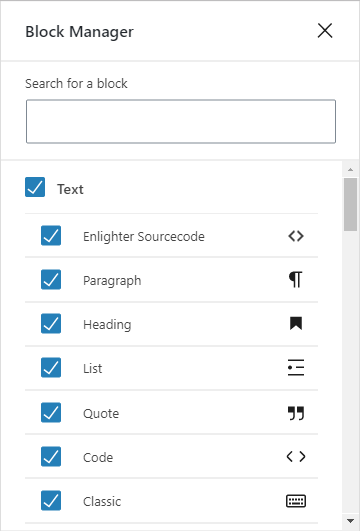
Furthermore, a good idea would be to go to the Options → Block Manager and disable the blocks that you don’t intent to use, to declutter your workspace. It you regret it afterwards, you can always return and re-enable them.
So, now that you know more about Gutenberg’s features and capabilities, what do you think? Do you still prefer the classic editor or are you more willing to give Gutenberg another chance? After all, Classic Editor will not evolve anymore, while Gutenberg will keep getting better and better and, being the “WordPress-way” of building sites, sooner or later, chances are that you will end up using it anyway.
(If you are a content manager, you might also like to read about some practical tips and good practices on writing for the web. If you are a developer searching for more technical tips, you can check out more Gutenberg related articles).
Thanks!!! If I only know how to get rid of the help text “Start writing or type /…” I would love to use other blocks than the classic block!
Hi Per
Joen is experimenting with changing writing prompt in the following PR: https://github.com/WordPress/gutenberg/pull/29611
Very helpful, Giorgos. Thanks for all your work. I just shared your great post “An easier way to tell apart Gutenberg blocks on the Editor” on the GeneratePress Facebook Group.
Question on the block editor: Do you know if there is a way to keep open the large block panel on the left side of the editor (that opens when you click the add block [ + ] at the top left of the editor? With drag & drop (in Gutenberg plugin) and full-screen mode, this would really make things slick for adding blocks.
Hi Peter and thanks for sharing the post!
As for your question, the truth is that I didn’t know how to do it, but I’ve dug a bit and I see that you can keep the left sidebar open following those steps:
1. In your functions.php, enqueue a js file like so:
wp_enqueue_script('custom-block-styles',
get_template_directory_uri() . '/js/block-styles.js',
array( 'wp-blocks', 'wp-dom-ready', 'wp-edit-post' ),
filemtime( get_template_directory() . '/js/block-styles.js' ),
true
);
2. Then, add the following code in it:
wp.domReady(() => {const isEditorSidebarOpened = wp.data.select('core/edit-post').isInserterOpened();
if (!isEditorSidebarOpened) {
wp.data.dispatch('core/edit-post').setIsInserterOpened('edit-post/document');
}
});
I hope that it works out for you.
Thanks, Giorgos!
I’ll give it a try – I use the Code Snippets plugin so I’ll probably have to adapt it.
Just FYI, your “Easier Way” post shared on FB is getting some really positive feedback, including “That’s great. Should be core WP.”
That’s great to hear!
Thanks again for sharing this 🙂
Hei Peter
James Koster has made a PR for keeping the Add block Inserter panel open until the user clicks to close it. https://github.com/WordPress/gutenberg/pull/29759
It should be a quick fix.